How to take better outfit photos with a phone and a self-timer
· Editorial team houstonnewsdaily24.com
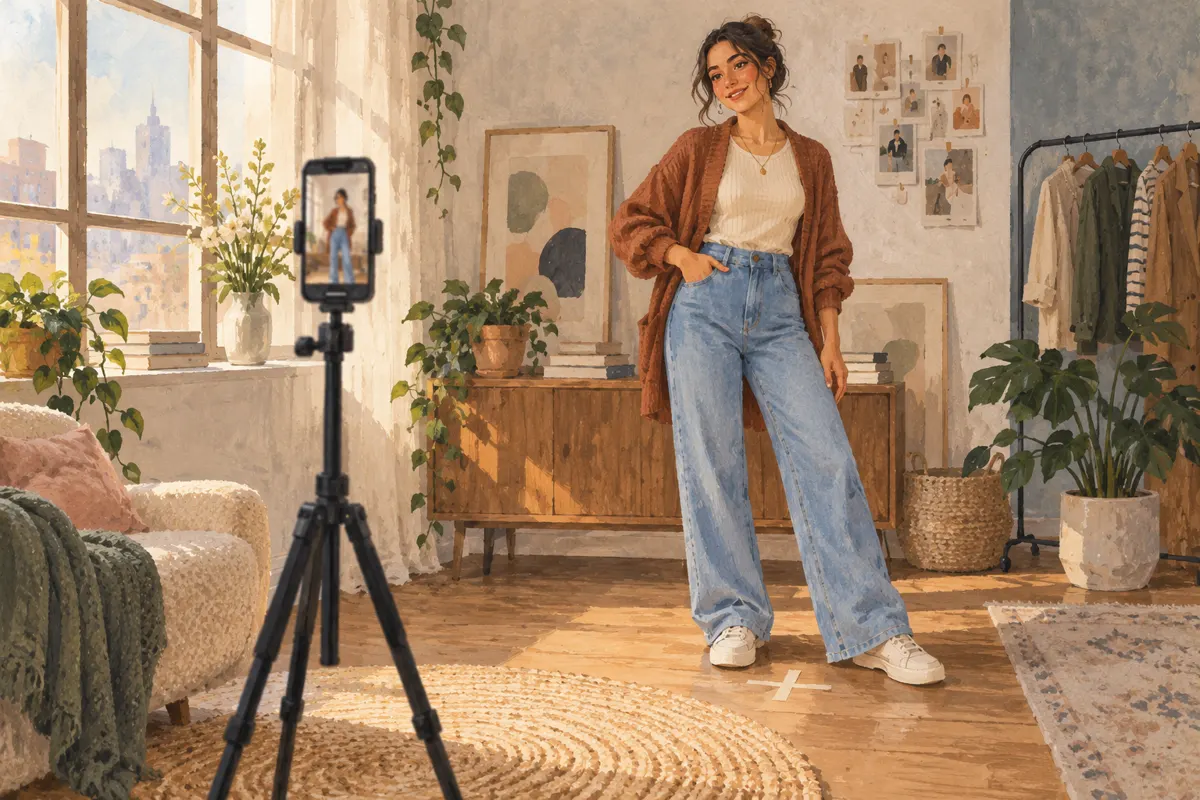
To take better outfit photos by yourself, stand in soft window light, secure your phone upright, and frame your whole outfit, including your shoes. Mark where you will stand, check focus with a test photo, and use a self-timer long enough to reach your position comfortably. Keep that setup consistent so you can concentrate on the clothes.
Find soft window light and a simple background
Choose a spot near a window or glass door where daylight reaches you without direct sun falling across your body. Bright stripes of sunlight can leave parts of the outfit in shadow and others much brighter. Move beyond those patches and take a test photo before rearranging the room.
Keep the background simple enough that you can see the clothing clearly. A plain wall is useful, but you do not need an empty room. Remove the objects that distract from the outfit, especially anything appearing beside your head or behind your shoes. Leave a clear walking route between the phone and your standing spot.
Stabilize the phone and frame your full outfit
Support the phone on a firm surface with the lens unobstructed. If you use books to hold it upright, make sure they cannot slide and that pressing the shutter will not knock the phone over. Avoid balancing it on a tall, unstable pile.
Start around chest height and keep the phone upright rather than sharply tilted. Check that the frame includes your head, the full garment, and your feet. If they do not fit, try increasing the distance between the phone and your position before changing the angle. Leave a little space above your head and below your shoes.
Mark your position and check focus
Proposed setup: place a small removable marker on the floor where your feet should go. This gives you a repeatable position after each trip to the phone. Keep it outside the visible frame if possible, and choose something flat that will not create a trip hazard.
- Place a temporary object at your standing position, roughly where your torso will be.
- If your camera app supports it, tap that object to set focus. Use a focus lock only if the app offers one.
- Remove the object, start the timer, and stand on your marker for a test shot.
- Review the photo closely. If the outfit looks soft, repeat the focus check at the same distance.
Camera controls vary, so let the test image guide you. Check the clothing as well as your face: you want seams, hems, and layers to be clear enough to assess the outfit.
Use the timer with a few easy poses
Choose a 10-second timer if your camera offers one. That gives you time to walk into position, settle your clothes, and relax before the shot. Practice once so you know the timing and can press the shutter without disturbing the phone.
- Face the camera with your arms relaxed so the overall outfit is visible.
- Turn slightly to one side to show the silhouette and how the layers sit.
- Take a detail photo of a feature you want to remember, such as a cuff, bag, or shoe pairing.
Practice your poses before starting the countdown. A hand resting lightly on your thigh or tucked into a pocket can feel comfortable, but check that it does not hide an important detail. Let your expression stay relaxed; the photo only needs to document what you are wearing.
Review one shot and repeat the setup
Review the first photo before taking several more. Are your shoes fully visible? Is the background distracting? If you wear glasses, check for glare and try a small adjustment to your chin or position. Change one thing at a time so you can see what helps.
Proposed routine: save one clear full-length image per outfit in a dedicated album, and note your phone placement and standing spot. Reusing that arrangement makes the next session easier. When reviewing outfits later, look at the fit, proportions, and combinations you enjoyed wearing rather than searching for a perfect pose.